
When we were house hunting, Mike and I both really wanted a fireplace in the living room. We decided not to add it when we built our house because of the cost and the design. For the last several months we've been discussing what to do with our main wall and a fireplace of some sort was a must. Neither one of us really care for gas fireplaces due to safety issues and although we would love to do a wood burning, it's just not in our budget and it would be so much work! More than anything I could love a mantel and a small insert to place candles and that's where our vision for the wall started.
My big motivator was fall. I told Mike over and over, “It must be done for fall!" Why? I want to be able decorate it for fall and have a place to hang our Christmas stockings. Yep that’s my incredible reasoning and the fact that we really needed a better focal point in the room and we didn't like te idea of a massive entertainment center.
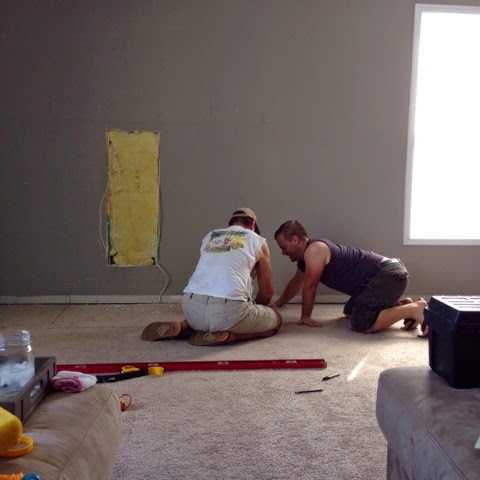
Mike's parents planned to visit us for a week over Labor Day so we planned to whip this project out with them since they have skill and some tools we didn't have. To be honest I was scared this was going to become a very complicated project because we had to frame everything out and drywall. I loved coming up with the whole design, but the actual part of trying to figure out measurements? Um no thanks...leave that to my engineering Hubster.
Now when it comes to projects I constantly change my mind. I've been blessed with a very calm and patient man as my husband. He graciously puts up with every little change I make even if I go back and forth. For this project the final debate {like days before my in-laws came into town} was to mount the tv above the fireplace or not. This whole dilemma also came after Mike had finished the measurements and taped everything out on the wall. Awesome timing, I know. In our initial sketch we planned on mounting the tv above, but I really hate looking at a tv directly above the fireplace. Our first solution was just to put some sort of cover over the tv like doors. But of course every time we wanted to use the tv we would have to take everything off the mantle. Grrrrrr. Then we thought...let's raise the tv and do sliding doors, but then it's too high and we would be cranking our necks just to see the picture. So how about putting the tv in a built-in next to the fireplace. Sounds better, but I still wanted doors. I thought for sure Mike was going to throw the whole project out the window, but he didn't :) I really do love him. So we finally came up with a solution....and the tv was going to the side. Whew, so glad that decision was made and problem solved. Only problem we created now was another project with more built-ins that will come as a later project.

When we bought our materials and actually started the project, like ripping up the carpet, I was a wreck. But in reality it was pretty simple. I'm just thankful we had extra guiding hands to take all our ideas and actually make them real! It's amazing how complicated one can make a design and someone else can come up with a much more simple idea. You have no idea how much work we saved ourselves just by having extra heads thinking throughout this whole process.


5. Now that the structure was pretty much done, we had the cosmetic stuff to finish. Mike ended up taping the entire fireplace off with plastic to sand the drywall mud. This was such a mess and the worst job of it all. Once he was done with sanding, we used a piping bag and piped the mortar into the brick and used a tuck tool to smooth everything out. This part was much harder than I anticipated. It took a little bit to find the right consistency to actually pipe the mortar, but once we got the right consistency it made things so much easier.


6. It's almost there! Our last major step was putting up our trim and painting. We wanted a little depth for our trim and did so by covering the entire bottom half in 1/2 inch paint grade wood and added 1/2x1/4x2 inch wood trim and created a shaker design. After priming all surfaces we used a semi-gloss white paint for the entire fireplace to match our existing trim, attached our dark walnut stained mantle and reattached the carpet and baseboards.

I’m in awe of how it turned out and absolutely love it. Since it was our very first time attempting drywall and mudding there are quite a few character marks {as I like to call them}, but I am very proud of what we were able to do on our own. A faux fireplace that actually feels like it was once a real fireplace and not just a phony, wimpy mantle....ah I just LOVE IT!

Of course as soon as it was done I had decorate! Happy Fall!!!

Post a Comment