Sunday, June 28, 2015
a fairy garden party
Over the weekend we celebrated Kensi's birthday with her friends. Kensi asked for a fairy themed party and especially wanted everyone to have wings. We kept the party short, simple and sweet by making fairy houses, wearing wings and serving up some sweet treats.


For food I made a simple pasta salad and fruit salad, Individual snack cups filled with twigs (pretzel sticks) and acorns (NutterButter mini cookie, Hershey Kiss and a chocolate chip), pink lemonade and scrumptious cupcakes we picked up from While Foods.


We knew the little girls would have so much fun creating their very own fairy house with paint, glitter and flowers. We also had some butterflies, ladybugs, pebbles and miss to adorn each house.


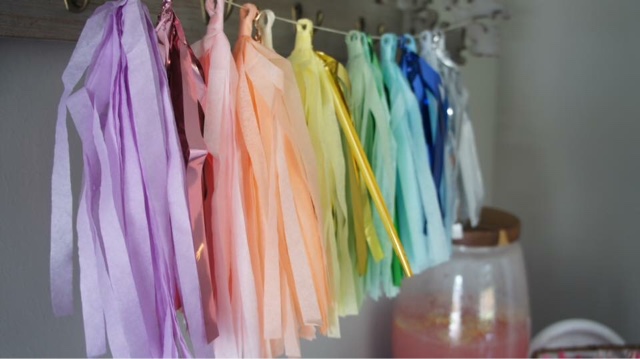
For party decorations I used our rainbow tissue paper garland from the playroom and then found some spring and summer floral garland at the craft store clearanced out.


After decorating, playing and eating, Kensi gave each of her friends a little favor box filled with pixie dust and Annie's Bunny Fruit Snacks. The girls also took home their fairy wings for future fairy fun!
Sources:
Food:
Pasta Salad: Tri-colored pasta, edamame, tomatoes, green onions, cucumber, homemade vinegrette.
Fruit Salad: blueberries, strawberries, nectarines.
Acorn Snack: acorns (mini NutterButter cookie, Hershey Kiss, chocolate chip), pretzel sticks
Cupcakes: Whole Foods
Drink Dispenser: Target
Glass Milk Bottles: Hobby Lobby (similar here)
Decorations:
Floral Garland: Michaels Craft Store
Tissue Paper Garland: Carousel Lane
Paper Laterns: Target
Bird Houses: Michael's Craft Store
Fairy Decorations: Hobby Lobby & Michael's Craft Store
Fairy Wings: Amazon
Favor Boxes: Recollections Craft It
Friday, June 19, 2015
mini powder bath makeover
Our outdoor projects are somewhat finished, at least for this phase in the game so we decided to show some love inside. We started wth the powder bathroom. Remember when we moved in I mentioned we chose Sherwin Williams Functional Gray for the entire house?? Well the color isn't bad by any means but the finish is. The builder used a contractors grade flat paint and only did one coat. It's pretty bad. I hate flat paint. I only recommend using it for ceilings and that is it! It shows every smidge, smudge and fingerprint. But I'm sure I've ranted about this once or twice already. The bathroom was just dull and was in desperate need for love. Here's the before....


Totally excuse the toilet, especially up....this photo was from our final walk through...before we moved in. The black and white artwork was from our very first apartment and just wasn't doing it anymore. To me it was screaming 'I just graduated college, just got married, trying to furnish my first place and make it cute!' Over it!
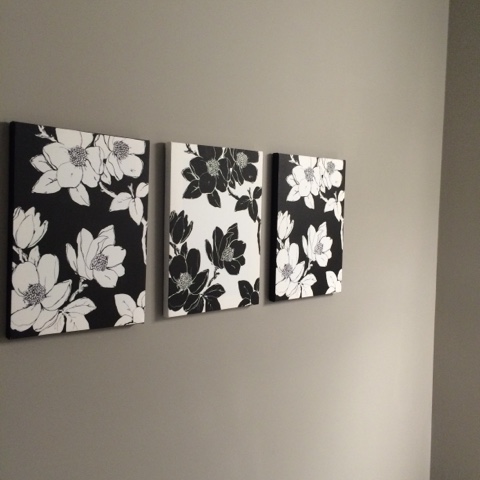
Here's where we're at now....

The only things we changed were the paint color and the artwork. We still need to frame out the mirror and add some shelves, but even this little bit has made a huge difference to us. I found the artwork clearanced out at Hobby Lobby and we used Sherwin Williams Web Gray in satin finish. Bye bye fingerprints....I can wipe you away now!
Next stop...playroom.
Monday, June 8, 2015
the muffin fan
This past week, Kensi and I spent time in the kitchen making muffins. Muffins are often in our kitchen and we were in need of some. In particular we wanted to bake chocolate muffins, one of my favorite, but I went on the search for a healthier version and then it turned into throwing in our own add-ins and it turned out delicious!
The original recipes we found came from Cooking Light and it uses brown sugar and red wine vinegar. I was actually out of red wine vinegar so instead I used balsamic. On top of adding chocolate chips to these scrumptious muffins, we also added in chocolate covered espresso beans which totally took them up a notch and they were awesome! So here is our tweaked recipe...
Espresso Bean & Chocolate Chip Muffins
1-3/4 cup Flour
1/2 cup Brown Sugar
1/4 cup Unsweetened Dutch Cocoa Powder
1 teaspoon Baking Powder
1 teaspoon Baking Soda
1/4 teaspoon Kosher Salt
1 cup Warm Water
1/4 cup Canola Oil
1 Tablespoon Balsalmic Vinegar
1 tablespoon Vanilla Extract
1 large egg, beaten
1/2 cup semi-sweet or dark chocolate chips
1/2 cup chocolate covered espresso beans, chopped
Cooking Spray
Preheat oven to 400 degrees F.
Combine flour, brown sugar, cocoa powder, baking powder, baking soda and salt.
In another bowl combine water, oil, vinegar, vanilla extract and egg.
Slowly combine the liquid mixture into flour mixture. Stir in chocolate chips and espresso beans.
Line a muffin pan with liners and coat the liners with cooking spray. This recipe will make 12 cupcake size muffins or 6 large muffins. Divide the batter among the muffin cups and bake at 400 degrees F for 15-20 minutes or until a inserted toothpick comes out clean. Allow muffins to cool on a wire cooling rack.
Other favorite muffin recipes are my sister Trish’s Pumpkin Harvest Muffins she found on Jillan Michaels and All Recipes: To Die For Blueberry Muffins. We hope you try it and enjoy our Espresso Bean & Chocolate Chip Muffins as much as we do!
Happy Baking!
Subscribe to:
Posts (Atom)