

Thursday, November 30, 2017
Our Home // Dining Room Makeover
Checking off another small project, our dining room! In waiting for the floors we held off on doing much of anything to the walls, but once the floors went it we replaced the baseboards and the rest is history.

 Our drappy flat paint was past it’s prime days after we moved in and this entire space needed something fresh and bright. We replaced all the baseboards with 1x4 pine and decided to add more character and texture to the walls by continuing vertical board and batten to the ceiling similarly to what we did in our entryway. Since this is our dining room we wanted to give it a little more pizzazz and did so by adding crown on top of our board and batten. To accomplish this look we add a 1x2 board around the top perimeter of the wall for the crown to sit against. Had we not done this, there would have been a large gap between the vertical boards and the crown.

So, after the vertical boards were all in place, we installed our crown using the Kreg Jig Crown-Pro Crown Molding Tool. This kit makes installing crown molding yourself a breeze and we highly recommend it. We used it for our cabinets and saved ourselves hundreds of dollars. Now that all our boards were in place, it was time to caulk all our seams and prime the walls. For this project we purchased pre-primed pine boards rather than the premium pine boards and saved over $150 on this project!

// Before //

// After //
We painted everything with Benjamin Moore Super White to match the rest of our trim in the house. This room has officially been transformed from drabby to bright & classy!
// SOURCES //
Paint | Benjamin Moore in Bright White
Lighting | Home Decorators
Dining Table | DIY
Monday, November 27, 2017
Christmas Wish List

It’s the most wonderful time of year again and we’re busy finishing up our Christmas shopping for the kids so we can relax and enjoy all the festive fun of the Christmas season. We always try to keep things simple at home especially with gift giving. We really like the concept of something you want, something you need, something to wear and something to read, but we’re not super strict with it, we just like to use it as a guideline so we don’t go off the deep end when it comes to shopping.
We don’t usually go for the super trendy items for the kids. We really like to stick with toys and items they can grow with and will encourage play, rather than something they’ll quickly give up on in a few weeks or months. That being said, it doesn’t mean we skip what the kids really want, we just keep it simple. Right now Finn is very interested in Transformers and Kensi enjoys My Little Pony.
We’re really excited about this year, because the kids are getting older and grasping the understanding of giving more than receiving. We let each of the kids build a shoebox for Operation Christmas this year and we purchased a tree for a military family. We love being able to teach the kids the importance of creating Christmas magic for others in simple ways. It’s so important to keep it at the center of our focus rather than ourselves and I'm excited to share more about our thought on this in the next year.
So here’s our wish list for the kids this year! We know they’re going to be excited and a little bummed since we’ll be traveling for Christmas, but they’re have so much fun playing once we get back home.
Wood Work Bench // We’ve been looking for a fun and simple workbench for the kids over the last year, but really didn’t find anything we loved, that is until Hearth & Hand released theirs! The kids love helping us work on projects and they’re always in the garage learning new skills and building their own small projects (like a balance beam)!
Wood Block Set // I’ve had my heart set on a large colorful block set for a couple years now, but the price was just killing me. Instead, we purchased a set of natural wood blocks and I’m painting them in the garage. Much more work, but I love a good DIY and I can’t wait to see what the kids build!
Money Saving Piggy Banks // We are teaching our kids to be money smart. Each month, I’ll sit down with them and we count all their money they’ve received whether it’s from a birthday or chores and we sort it into three piles: save, spend and give. I found this cute piggy bank trio set that has a separate bank for each one, so now instead of sorting it every month, we can sort it immediately and place the money where it needs to go.
Puzzles + Games // All the kids enjoy working on puzzles. They’re great for building fine motor skills, cognitive skills and learning different concepts depending on the theme of the puzzle. I love this United States Map puzzle for learning geography. We also picked up one of the new wood board games from Target. We picked out CandyLand because it’s one of our most loved games and we no longer have any of the cardboard markers, because seriously who still has the cardboard markers all in one piece?
Rain Boots // I love having rain boots on hand for the kids because they’re so easy to put on, they typically run a little large so they last awhile and we can get quite a bit of rain here in coastal Carolina. London Littles also have super cute prints!
Muslin Quilts // We all love muslin quilts. Let’s be honest, I really need/want one in my size! Any-who, I love these blankets because they’re so cozy, breathable and warm. We use them for sleep, cuddling on the couch, walks in the stroller and even in the car. We currently own two, but since we use them all the time we decided to get a few more for the kiddos. We have a few different floral prints for the girls so I they’re sharing one this time around. I snagged this whimsical rainbow and unicorn print from Clementine Kids. Kensi is seriously going to die over excitement. For Finnley, I got the Zoology quilt. He’s going to love all the animals!
Books // This year Kensi has become much more mature and patient with reading and listening to stories. We came across The Fairy Bell Sisters over the summer and she’s officially hooked. She’s not reading on her own yet, but I love being able to read to her and it’s just special one-on-one time we get together and can enjoy. To help her along her reading journey and to spark her interest even more so I found My Little Pony Phonic Box Set at Barnes & Noble. Finn still really loves the BabyLit books, but he’s also taken an interest in Dr. Suess and he loves anything that has to do with robots. I got him The Adventures of Otto Collector’s Set by David Milgrim. Finn loves reading silly books; I adore hearing his sweet giggle with all the silly words. Olivia loves getting books off the bookshelves, climbs into my lap and says ‘wee” (read). It’s so dang cute. We enjoy reading about lots of different things.
A few other fun items we’ve found throughout the year include Boogie Boards Writing Tablet. We found them at Costco in the office supply aisle. They’re essentially a digital version of a magna doodle board, except it has a button to clear the image rather than a swipe. The Hot Cocoa Set by Hearth & Hand at Target and the kids all love Legos so we have a few fun small sets for their stockings. Kensi stumbled upon Shrinking Trinkets in the Land of Nod catalog and I flipped with excitement! I loved making Shrinky Dinks when I was little and she thought the Shrinking Trinkets were pretty cool.
I do get a lot of questions about where we shop, how we find deals and what tips can I give to save as much as possible. Our biggest trick is shopping all year round. I often hit up the clearance section at Barnes & Noble. They have dozen of toys and puzzles marked to 70% off sometimes and it’s a total steal! I constantly wait for sales. There is ALWAYS a sale, it’s just a matter of waiting for it. Shops like Land of Nod will send out 15% off coupons almost monthly throughout the year. We also compare prices with Amazon and can usually find a better deal there. When we shop we try and get items that can grow with all our kids and are gender neutral. Of course we buy some items that are kid specific, but in general with larger items we try to go as neutral as possible (like the work bench). I also try and keep the mindset that they don’t HAVE to have anything. We are extremely blessed and we try not to get caught up in stuff or spending too much money on it, but instead focusing on the moments and experiences. At the end of the day if we’re gone tomorrow none of the stuff is going to matter, but we’ll always have the memories.
We don’t usually go for the super trendy items for the kids. We really like to stick with toys and items they can grow with and will encourage play, rather than something they’ll quickly give up on in a few weeks or months. That being said, it doesn’t mean we skip what the kids really want, we just keep it simple. Right now Finn is very interested in Transformers and Kensi enjoys My Little Pony.
We’re really excited about this year, because the kids are getting older and grasping the understanding of giving more than receiving. We let each of the kids build a shoebox for Operation Christmas this year and we purchased a tree for a military family. We love being able to teach the kids the importance of creating Christmas magic for others in simple ways. It’s so important to keep it at the center of our focus rather than ourselves and I'm excited to share more about our thought on this in the next year.
So here’s our wish list for the kids this year! We know they’re going to be excited and a little bummed since we’ll be traveling for Christmas, but they’re have so much fun playing once we get back home.

/ Rain boots / Wood Work Bench / Wood Blocks / Board Game / Muslin Quilt / Smart Piggy Bank / USA Puzzle /
Wood Work Bench // We’ve been looking for a fun and simple workbench for the kids over the last year, but really didn’t find anything we loved, that is until Hearth & Hand released theirs! The kids love helping us work on projects and they’re always in the garage learning new skills and building their own small projects (like a balance beam)!
Wood Block Set // I’ve had my heart set on a large colorful block set for a couple years now, but the price was just killing me. Instead, we purchased a set of natural wood blocks and I’m painting them in the garage. Much more work, but I love a good DIY and I can’t wait to see what the kids build!
Money Saving Piggy Banks // We are teaching our kids to be money smart. Each month, I’ll sit down with them and we count all their money they’ve received whether it’s from a birthday or chores and we sort it into three piles: save, spend and give. I found this cute piggy bank trio set that has a separate bank for each one, so now instead of sorting it every month, we can sort it immediately and place the money where it needs to go.
Puzzles + Games // All the kids enjoy working on puzzles. They’re great for building fine motor skills, cognitive skills and learning different concepts depending on the theme of the puzzle. I love this United States Map puzzle for learning geography. We also picked up one of the new wood board games from Target. We picked out CandyLand because it’s one of our most loved games and we no longer have any of the cardboard markers, because seriously who still has the cardboard markers all in one piece?
Rain Boots // I love having rain boots on hand for the kids because they’re so easy to put on, they typically run a little large so they last awhile and we can get quite a bit of rain here in coastal Carolina. London Littles also have super cute prints!
Muslin Quilts // We all love muslin quilts. Let’s be honest, I really need/want one in my size! Any-who, I love these blankets because they’re so cozy, breathable and warm. We use them for sleep, cuddling on the couch, walks in the stroller and even in the car. We currently own two, but since we use them all the time we decided to get a few more for the kiddos. We have a few different floral prints for the girls so I they’re sharing one this time around. I snagged this whimsical rainbow and unicorn print from Clementine Kids. Kensi is seriously going to die over excitement. For Finnley, I got the Zoology quilt. He’s going to love all the animals!
Books // This year Kensi has become much more mature and patient with reading and listening to stories. We came across The Fairy Bell Sisters over the summer and she’s officially hooked. She’s not reading on her own yet, but I love being able to read to her and it’s just special one-on-one time we get together and can enjoy. To help her along her reading journey and to spark her interest even more so I found My Little Pony Phonic Box Set at Barnes & Noble. Finn still really loves the BabyLit books, but he’s also taken an interest in Dr. Suess and he loves anything that has to do with robots. I got him The Adventures of Otto Collector’s Set by David Milgrim. Finn loves reading silly books; I adore hearing his sweet giggle with all the silly words. Olivia loves getting books off the bookshelves, climbs into my lap and says ‘wee” (read). It’s so dang cute. We enjoy reading about lots of different things.
A few other fun items we’ve found throughout the year include Boogie Boards Writing Tablet. We found them at Costco in the office supply aisle. They’re essentially a digital version of a magna doodle board, except it has a button to clear the image rather than a swipe. The Hot Cocoa Set by Hearth & Hand at Target and the kids all love Legos so we have a few fun small sets for their stockings. Kensi stumbled upon Shrinking Trinkets in the Land of Nod catalog and I flipped with excitement! I loved making Shrinky Dinks when I was little and she thought the Shrinking Trinkets were pretty cool.
I do get a lot of questions about where we shop, how we find deals and what tips can I give to save as much as possible. Our biggest trick is shopping all year round. I often hit up the clearance section at Barnes & Noble. They have dozen of toys and puzzles marked to 70% off sometimes and it’s a total steal! I constantly wait for sales. There is ALWAYS a sale, it’s just a matter of waiting for it. Shops like Land of Nod will send out 15% off coupons almost monthly throughout the year. We also compare prices with Amazon and can usually find a better deal there. When we shop we try and get items that can grow with all our kids and are gender neutral. Of course we buy some items that are kid specific, but in general with larger items we try to go as neutral as possible (like the work bench). I also try and keep the mindset that they don’t HAVE to have anything. We are extremely blessed and we try not to get caught up in stuff or spending too much money on it, but instead focusing on the moments and experiences. At the end of the day if we’re gone tomorrow none of the stuff is going to matter, but we’ll always have the memories.
Wednesday, November 22, 2017
Favorite Turkey Leftover Recipes
Every year I see dozens of recipes for leftover turkey from thanksgiving. But I have to be honest, some of them just don’t look appetizing to me and they have a bazillion steps. Who wants a complicated recipe to make with leftovers after you just spent the day before cooking all the goods? Not me! I love simple and easy recipes to use with leftovers and fear not I’m sharing a few of our favorites.
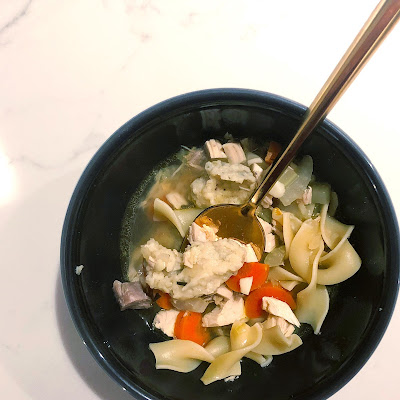
I love eating soup all year round and whenever we have chicken leftover I usually make up some kind of soup to warm our souls. Same goes for leftover turkey. My favorite noodle soup is my great-grandmother’s chicken noodle soup with liver dumplings. It’s a recipe she was taught by her mother with she was young and it traveled with them from Czechoslovakia. It’s a favorite at our house and whenever I share this recipe everyone cringes at the thought of liver, but it was used because they just didn’t waste anything. It’s mixed with flour, egg and garlic salt (which totally cuts the taste) and it’s my favorite part of the soup. Recently, while my sister visited I made her chicken noodle soup, but because I didn’t have liver in the freezer I created my own dumplings without it. They turned out delicious, but they go better with turkey noodle soup. Here’s a little twist on my great-grandmothers chicken soup.....turkey noodle soup, along with a couple more leftover favorites.
I love eating soup all year round and whenever we have chicken leftover I usually make up some kind of soup to warm our souls. Same goes for leftover turkey. My favorite noodle soup is my great-grandmother’s chicken noodle soup with liver dumplings. It’s a recipe she was taught by her mother with she was young and it traveled with them from Czechoslovakia. It’s a favorite at our house and whenever I share this recipe everyone cringes at the thought of liver, but it was used because they just didn’t waste anything. It’s mixed with flour, egg and garlic salt (which totally cuts the taste) and it’s my favorite part of the soup. Recently, while my sister visited I made her chicken noodle soup, but because I didn’t have liver in the freezer I created my own dumplings without it. They turned out delicious, but they go better with turkey noodle soup. Here’s a little twist on my great-grandmothers chicken soup.....turkey noodle soup, along with a couple more leftover favorites.

Turkey Noodle Soup with Dumplings
2 tablespoons olive oil
1/2 cup white wine
1/2 onions, chopped
2 carrots, sliced
2 celery stalks, chopped
3 garlic cloves, minced
4 cups chicken stock
3/4 cup dried egg noodles
1 cup or more leftover turkey, chopped
*dumpling recipe follows*
In a pot, heat olive oil and saute onions, carrots, celery and garlic for about 4 minutes. Delgaze pot with wine, scrape the bottom of the pot to remove any brown pieces. Add chicken stock and bring to a boil. Add dumplings, then egg noodles and cook until al dente, about 6 minutes. Add leftover turkey to heat through and serve.
Dumplings
5 tablespoons flour
1/2 teaspoon garlic salt
1/4 teaspoon poultry seasoning
1/4 teaspoon italian seasoning
1 egg
Mix ingredients in a small bowl until it forms a paste. Use two spoons and drop small clumps into simmering soup. Let them cook for a few minutes, they will rise to the top when done.
TBLT with Pesto
Another favorite turkey leftover recipe comes from our sweet friends in Maryland. When we lived there neither of us had family close so we always spent Thanksgiving together. We would do all the best cooking Thursday and then hang out together on Friday after shopping and eat all over again. Phil always made the best leftover Turkey BLT sandwiches and it’s a staple every Black Friday! It’s so easy...just make your typical fixings for BLT (bacon, lettuce & tomato) and add leftover turkey. Mike and I love adding a couple slices of avocado and instead of mayonnaise we add pesto. So simple and oh so good!
BBQ Turkey Pizza
I always keep Naan bread on hand in the freezer for quick personal pizzas. Using leftover turkey in place of chicken makes for good and easy pizzas for the family. We start by sprinkling a small amount of monterey jack cheese on the naan bread, add our turkey, sliced onions (for me), pickled banana pepper slices. Then drizzle our favorite BBQ sauce over the top and finish with a generous sprinkle of cheese. Pop them in the oven at 450 degree F for about 8 minutes.
Tuesday, November 21, 2017
Turkey In Pieces + Thanksgiving Sides

The kids have been making a few turkey decorations for our thanksgiving dinner and I can hardly wait to spend the day relaxing with my crew and eating all the best cozy foods! While we prep for Thursday, we also setup a Christmas tree in the playroom and let the kids decorate it for the week to keep them busy. It’s definitely done it’s job as they’ve been spending long periods of time in there taking the ornaments on and off the tree. I can’t wait for Friday when we fully decorate for Christmas!

If you happen to follow me on Instagram (@rachbraden) then you may have seen my little blurb about a new turkey recipe we tried over the weekend which had us cutting our turkey into pieces: breast, legs, thighs and wings. I’m an avid Food Network watcher and caught a few episodes of Farmhouse Rules with Nancy Fuller last week. She shared a turkey recipe that had me raising my eyebrows and questioning everything I’ve ever learned and been taught about roasting a turkey.
As I watched her in awe explain each step in her Gigi’s Thanksgiving turkey recipe I called my mom and began throwing all my questions at her. Neither of us had ever seen a turkey done in pieces, but we were intrigued. We read the reviews from the recipe online and every single person wrote how much they loved this particular recipes and they vowed they wouldn’t make a turkey any other way. Mike and I decided we would let our friends be our guinea pigs so we could try this recipe and give our family either a thumbs up or thumbs down.
We started by butchering our turkey Friday night in preparation for Saturday Friendsgiving. This can be done by the butcher at the store, but we bought our turkey frozen and conquered it ourselves and placed the turkey parts on a rimmed baking sheet to chill in the fridge. It really wasn’t difficult at all, but we watched a few YouTube videos to know exactly what to do.
Early Saturday afternoon we started making our turkey. This recipe braises the legs and thighs on the stove in liquid that becomes the gravy and then roast the breast in the oven. Everything is suppose to cook and be done in under three hours, but this was not true in our case. Everything was done much sooner, even with doing a larger turkey. So it’s really important to monitor the breast by temperature rather than time. We shaved off about 45 minutes of cooking time.
In the past turkey has always been delicious, but we always have so much left over and the dark meat is not usually eaten....but, not this time. This turkey was so flavorful and moist! The dark meat was ALL gone and we have very little turkey leftover. This recipe was incredibly easy and we’ll be making our turkey on Thursday this exact same way! No more dried out meat, no uneven cooking, no more waiting for hours, it was awesome! I really hope you give this recipe a try (link is at the bottom with the other recipes) and let us know how it worked for you 💛
Other recipes I’m sharing with you today for the most festive season of all include a few sides and a link to our favorite homemade apple pie. At our Friendsgiving everyone brought a dish or two to share with the group. I love green beans, especially green bean casserole, but I’m the only one that usually eats it at our house, but my friend Amanda made super cute green bean bundles wrapped in bacon and I fell in love! I believe I ate six bundles and I had to have the recipe and I have to share it with all of you!
Wishing you all a very Happy Thanksgiving this week!
Roasted & Braised Turkey
Green Bean Bundles
Buttered Rosemary Rolls
French Apple Pie
Sunday, November 19, 2017
Prettiest Apple Pie

Right before Mike and I were married I had this aspiration of making incredible pies. I’m not sure why, but I so badly wanted to be known as a killer pie maker. Unfortunately, this dream didn’t come true once I found my first grown up job and literally lived for the weekends with our busy non-stop life. I decided almost nine years later that it was time to seriously nail this dream, so I’ve been busting out pies and other baked goods lately and sometimes my creations (success or fail) make their way to Mike’s office. I’m pretty sure they don’t mind all the sweet happenings and if they do they’re all southerners who sweetly lie to avoid hurting any feelings.
My favorite pie and the first pie I ever made back in Mrs. Klaus’ fourth grade class, is apple. It’s nostalgic as it bursts with tart apples and spicy cinnamon, a combination I have a hard time denying. My favorite recipe is actually from my mom, or my sister, or my sister-in-law? I can’t even remember who brought this delicious recipe to light, but it’s a favorite in our family. To be completely honest, we all swoon over the crumb topping option and it’s pretty incredible to see this mound of apples and the mountain of crumb topping not topple over. However, we hosted a Friendsgiving this weekend and I opted to use pie crust to make a delicate and decorative topping instead.

I make my own pie crust, originally my aunt’s recipes, mostly because it’s just simple to throw it together in my food processor. I start by adding in my flour and my cold butter. Making sure to cut my butter into small pieces before adding it to my flour. I let it blend together for a few minutes until I can no longer see any butter. Then I slowly add 1/3 cup to 1/2 cup of ice cold water until my dough forms into a ball. This pie crust recipes makes three bottoms crusts.
Once my pie dough is ready I roll out an 12 inch circle to place in the bottom of my pie dish. Making sure it comes up the sides and just over the rim. Fill my crust with the apple filling. Then using my dough scraps i roll it out again to make a variety of shapes and strips to make a top crust. I love mixing things up and making multiple different creations for something unique and different. The best part is, no two pies are ever the same!

My favorite pie and the first pie I ever made back in Mrs. Klaus’ fourth grade class, is apple. It’s nostalgic as it bursts with tart apples and spicy cinnamon, a combination I have a hard time denying. My favorite recipe is actually from my mom, or my sister, or my sister-in-law? I can’t even remember who brought this delicious recipe to light, but it’s a favorite in our family. To be completely honest, we all swoon over the crumb topping option and it’s pretty incredible to see this mound of apples and the mountain of crumb topping not topple over. However, we hosted a Friendsgiving this weekend and I opted to use pie crust to make a delicate and decorative topping instead.


I make my own pie crust, originally my aunt’s recipes, mostly because it’s just simple to throw it together in my food processor. I start by adding in my flour and my cold butter. Making sure to cut my butter into small pieces before adding it to my flour. I let it blend together for a few minutes until I can no longer see any butter. Then I slowly add 1/3 cup to 1/2 cup of ice cold water until my dough forms into a ball. This pie crust recipes makes three bottoms crusts.
Once my pie dough is ready I roll out an 12 inch circle to place in the bottom of my pie dish. Making sure it comes up the sides and just over the rim. Fill my crust with the apple filling. Then using my dough scraps i roll it out again to make a variety of shapes and strips to make a top crust. I love mixing things up and making multiple different creations for something unique and different. The best part is, no two pies are ever the same!

French Apple Pie
// Filling //
9 apples (3 granny smith, 3 pink lady, 3 fugi) peeled & sliced
1/2 lemon, juiced
1/2 cup + 2 tablespoons granulated sugar
2 tablespoons cornstarch
2 teaspoons cinnamon
1/2 teaspoon nutmeg
1 tablespoon flour
1 tablespoon flour
Peel and slice apples and toss in a bowl with lemon juice. Then in a small bowl mix sugar, cornstarch, cinnamon and nutmeg. Sprinkle over apples and toss to combine. Place rolled pie crust into pie dish and sprinkle the one tablespoon of flour on top. Use fingers to spread flour across the bottom of the crust. This will help keep the crust from getting soggy. If baking immediately, pour apples into pie shell, mounding them higher in the center. If making ahead, place apple slices in a gallon zip bag and refrigerate. When ready to put pie together, scoop apple slices out and avoid dumping all the liquid into the shell. Once apples are mounded, pour 1/2 the liquid on top of the apples. Sprinkle 1/4 teaspoon of additional cinnamon and 1/8 teaspoon nutmeg onto of apples. Continue by topping with desired crust/topping.
If using crunch topping for the pie top, then continue with the crumb topping recipe, if using pie crust then add it onto of the apples, add two tablespoons of smaller cubed butter and brush with milk and bake.
// Crumb Crunch Topping //
1/2 cup plus 2 Tbsp. flour
1/2 cup light brown sugar
1/3 cup granulated sugar
1 tsp. cinnamon
1 stick (1/2) cup cold butter, cut in small pieces
Place in food processor until mixture forms moist, coarse crumbs that clump together easily. Pat topping evenly over apples.
Heat oven to 400 degrees. Place pie on a rimmed baking sheet to catch any bubble over. Bake 15 minutes, place a piece of parchment paper over the top of the pie to prevent it from getting too dark. Drop temperature down to 350 degrees and bake an additional 45 minutes longer.
Pie Crust
3 cups flour
1 cup cold butter, cut into small pieces
1/3 to 1/2 cold water
In a food processor, add flour and cubed cold butter. Mix until butter is fine and blended into flour. Next, slowly pour cold water into the flour mixture while the food processor runs. Add enough water until dough forms a ball. Remove and roll out in three 12inch pie crusts.
Thursday, November 9, 2017
Christmas Book List

I know we still have Thanksgiving ahead of us, but we are so ready to make the house extra festive for Christmas. Plus, now’s the time to start snagging a few new books before the rush of the holiday chaos. We’ve been picking up a few things here and there, including ordering a few new Christmas reads for our book shelves this season. We have a lot of books we switch out based on the seasons and holidays. The kids always have a difficult time waiting for the next season once I begin shuffling things around. Since I picked up a few new books this year, my plan is to wrap them and set them on their wall shelves and we can open a book leading up to Thanksgiving week.
The newbies on the shelf this year are so dang cute and I’m head over heels in love with Pick a Pine Tree by Patricia Toht. I especially love this read because it’s one of our family traditions to pick a real tree every year for our living room. I love being able to smell the sweet pine scent throughout the room and it brings back so many memories of when my family would go hunting for the perfect tree every Christmas. It was always an event and when we found THE tree it was definitely a moment just like in Christmas Vacation, with it all aglow!
When it comes to displaying our books, we often put our new additions in the playroom. I love adding a string of battery powered twinkle lights on the shelf. It makes the whole room feel that more cozy once the sun begins to set. We also place all our paperback books in a basket for the kids to read on their own and we always have a few scattered in each of their bedrooms so we’re not moving books to several places before our nightly bedtime routine.

This year I added The Night Before Christmas to our book collection. I know its a classic and it may be surprising we didn’t already own a version, but the story is longer and I didn’t feel like our kids had the attention span to thoroughly enjoy and understand the story. I feel Kensi is old enough now, and Finn loves to do everything his big sister does. I found this version of the classic tale and we love the illustrations. They’re so whimsical and a have the perfect touch of Christmas magic. Finn has already called dibs on his favorite Christmas book, Gingerbread Pirates. This one I’ve shared multiple times over the last couple years and I’ll share it again this year because it’s just so good!

The newbies on the shelf this year are so dang cute and I’m head over heels in love with Pick a Pine Tree by Patricia Toht. I especially love this read because it’s one of our family traditions to pick a real tree every year for our living room. I love being able to smell the sweet pine scent throughout the room and it brings back so many memories of when my family would go hunting for the perfect tree every Christmas. It was always an event and when we found THE tree it was definitely a moment just like in Christmas Vacation, with it all aglow!
When it comes to displaying our books, we often put our new additions in the playroom. I love adding a string of battery powered twinkle lights on the shelf. It makes the whole room feel that more cozy once the sun begins to set. We also place all our paperback books in a basket for the kids to read on their own and we always have a few scattered in each of their bedrooms so we’re not moving books to several places before our nightly bedtime routine.


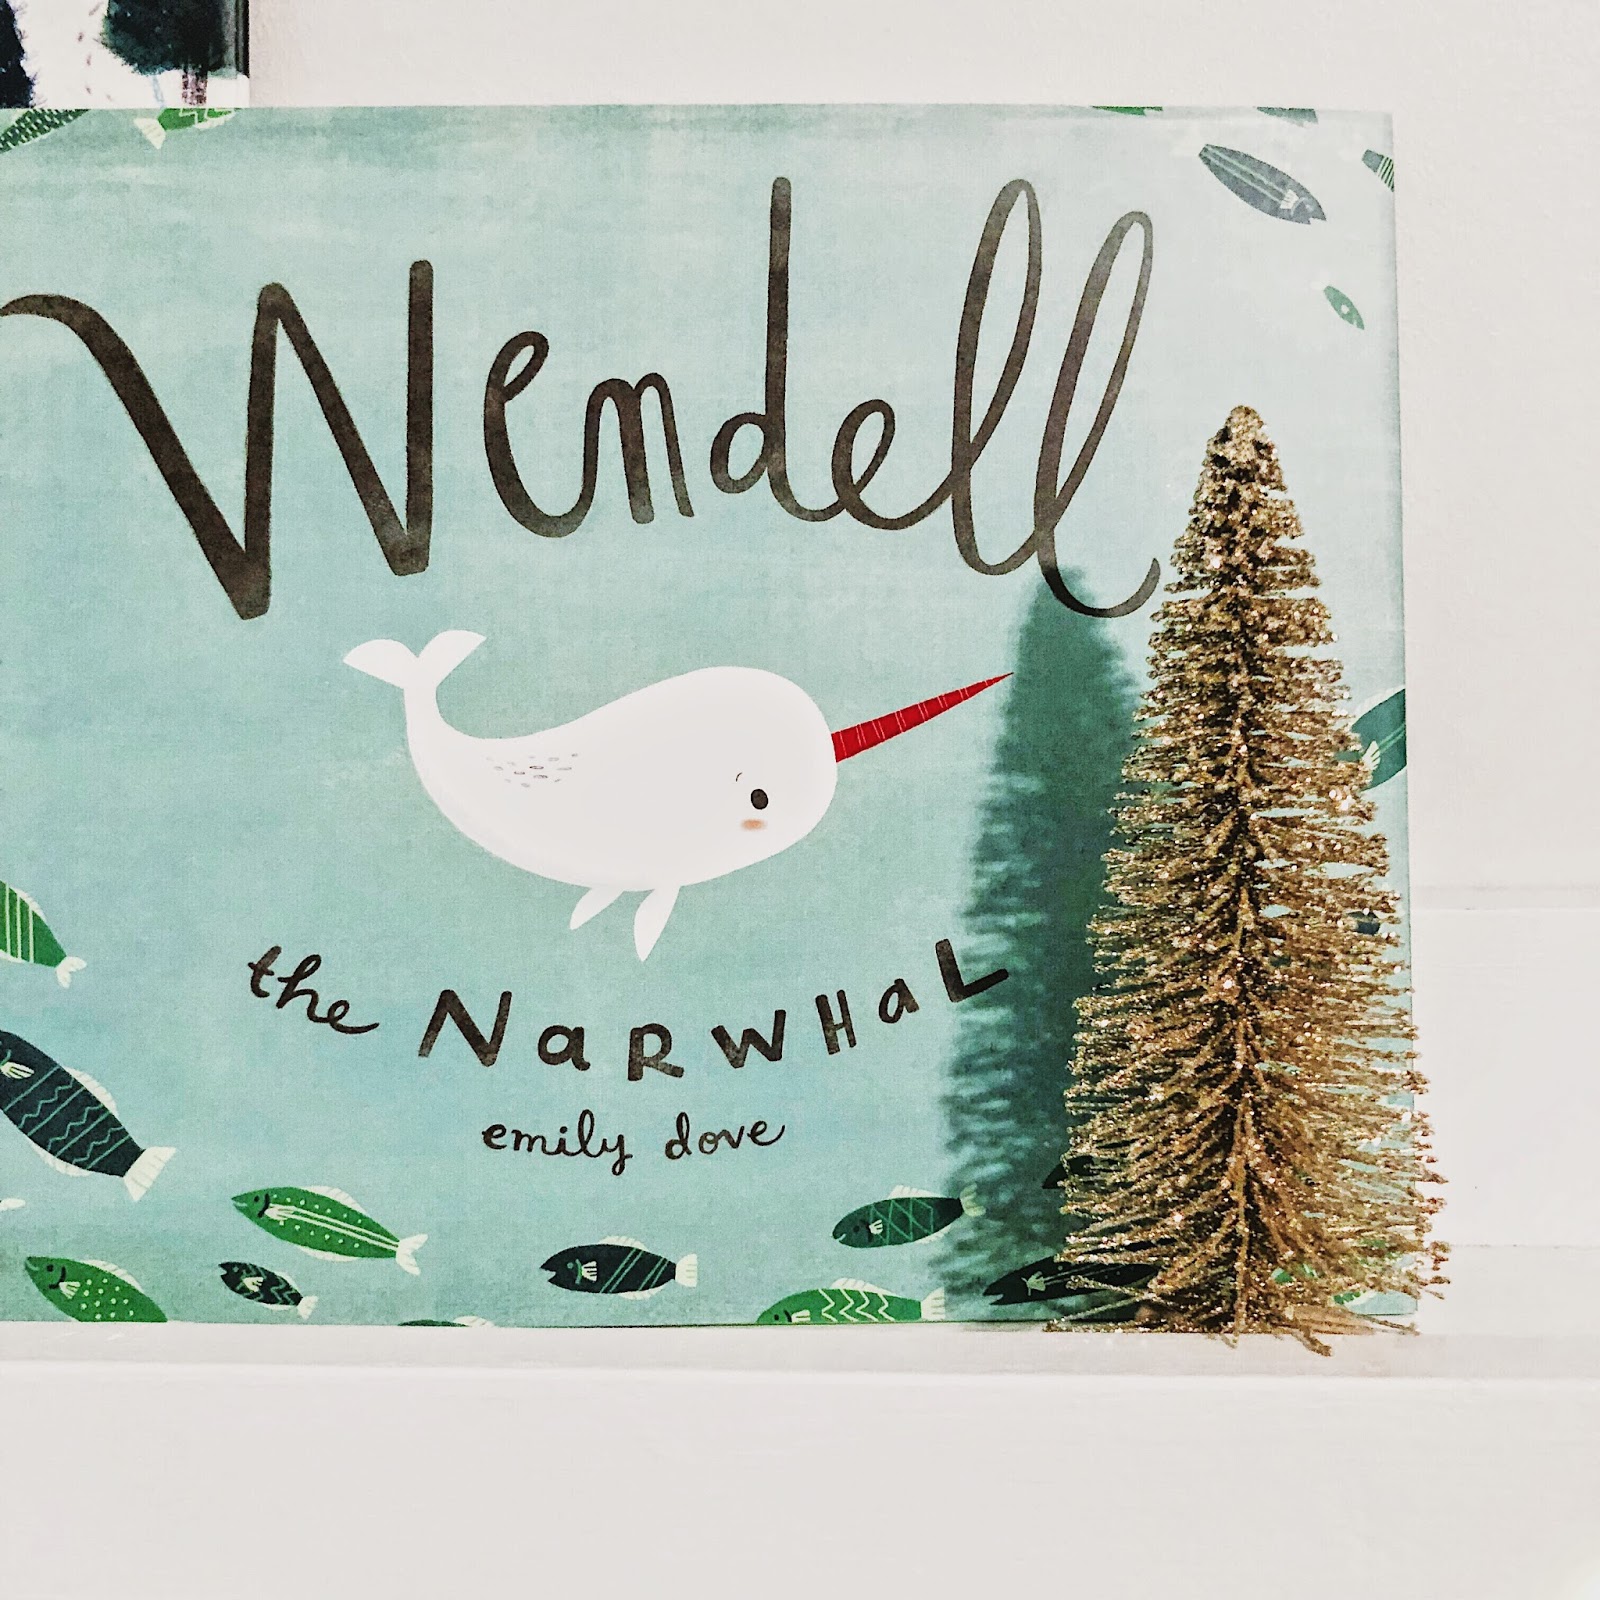
// Pick a Pine Tree // Wendell the Narwhal // The Little Reindeer // Home Alone // A Christmas Carol // Olivia Helps with Christmas // The Night Before Christmas //
Wednesday, November 1, 2017
Halloween 2017

We kicked off Halloween weekend by going to our local aquarium for trick or treating under the sea. Kensi happened to get a My Little Pony mask in her Happy Meal earlier this week and took it upon herself to make her own costume. She paired her new mask with parts of my old dance costumes. Finn didn’t want to dress up at all this night so we opted for our skeleton jammies. He’s crying here because we took away the iPad while Livie just goes with the flow. Being the third child she has several costumes to choose from so we put her in Kensi’s parrot costume from 2013.
The kids loved being able to see a few of their favorite characters, getting lots of treats and playing games. Mike and I were impressed by the scuba divers in full costume carving pumpkins under water. That takes some serious skill!

Saturday we hosted our Halloween party. We love doing this every year and encourage everyone to come in costume. Mike and I dressed as Chip and Joanna Gaines, but it was a total dud. No one knew who we were even with my Waco t-shirt, Mike’s tool belt and #demoday hat. In fact, he was asked if he was Bob the Builder or Al from Home Improvement. ???? What? Needless to say we didn’t get pictures of us or Finn for that matter. He originally requested to be a dragon so I painted his face. Once he saw his reflection he flipped out. Tears rolled down his face, turning his cute green dragon into some sort of yellow streaked swamp monster. I cleaned him up and we were lucky he was willing to wear pajamas. Kensi asked to be a panda bear, and the cutest little panda. Of course she was most excited about having her face painted....a current favorite right now.


When Tuesday finally rolled around I was ready to move past Halloween. Our weekend was busy and we were exhausted, but we managed to get all our costumes done and trick or treat like champs. We did a family theme with Room on the Broom. It may be one of my favorite themes we’ve done and it started because Finn wanted to be a frog so we ran with it. Kensi was the witch and her costume consisted of this gorgeous star tutu, a handmade cloak and a hat. She was so excited to have all the best accessories with her broom, wand and cauldron which she used as her trick or treat pail. Finn’s costume was extremely simple since I knew he would only wear the bare minimum. I paired olive green pajamas with homemade frog eyes on a headband. He’s crying in this picture because he didn’t want to wear his eyes. Of course.
Olivia was the dog and I had a difficult time finding pieces to create a brown dog, so I opted for black and made simple puppy ears, which she didn’t want to wear either. You win some, you lose some. Mike went as the bird and wore a homemade mask covered in crepe paper to look like feathers and I went as the cat. We had so much fun and we had way more trick or treaters than expected. We ran out of candy only to refill and run out again!
We had so much fun this halloween, but we are so excited to move onto the next holiday! I know Thanksgiving is next, but we are ready to begin decorating for Christmas. I’ll probably slowly begin upstairs in the kids’ rooms and maybe try and sneak a few pieces here and there before we fully begin decorating Thanksgiving weekend!
The kids loved being able to see a few of their favorite characters, getting lots of treats and playing games. Mike and I were impressed by the scuba divers in full costume carving pumpkins under water. That takes some serious skill!


When Tuesday finally rolled around I was ready to move past Halloween. Our weekend was busy and we were exhausted, but we managed to get all our costumes done and trick or treat like champs. We did a family theme with Room on the Broom. It may be one of my favorite themes we’ve done and it started because Finn wanted to be a frog so we ran with it. Kensi was the witch and her costume consisted of this gorgeous star tutu, a handmade cloak and a hat. She was so excited to have all the best accessories with her broom, wand and cauldron which she used as her trick or treat pail. Finn’s costume was extremely simple since I knew he would only wear the bare minimum. I paired olive green pajamas with homemade frog eyes on a headband. He’s crying in this picture because he didn’t want to wear his eyes. Of course.
Olivia was the dog and I had a difficult time finding pieces to create a brown dog, so I opted for black and made simple puppy ears, which she didn’t want to wear either. You win some, you lose some. Mike went as the bird and wore a homemade mask covered in crepe paper to look like feathers and I went as the cat. We had so much fun and we had way more trick or treaters than expected. We ran out of candy only to refill and run out again!
We had so much fun this halloween, but we are so excited to move onto the next holiday! I know Thanksgiving is next, but we are ready to begin decorating for Christmas. I’ll probably slowly begin upstairs in the kids’ rooms and maybe try and sneak a few pieces here and there before we fully begin decorating Thanksgiving weekend!
Subscribe to:
Posts (Atom)
