

Wednesday, November 30, 2016
thanksgiving 2016
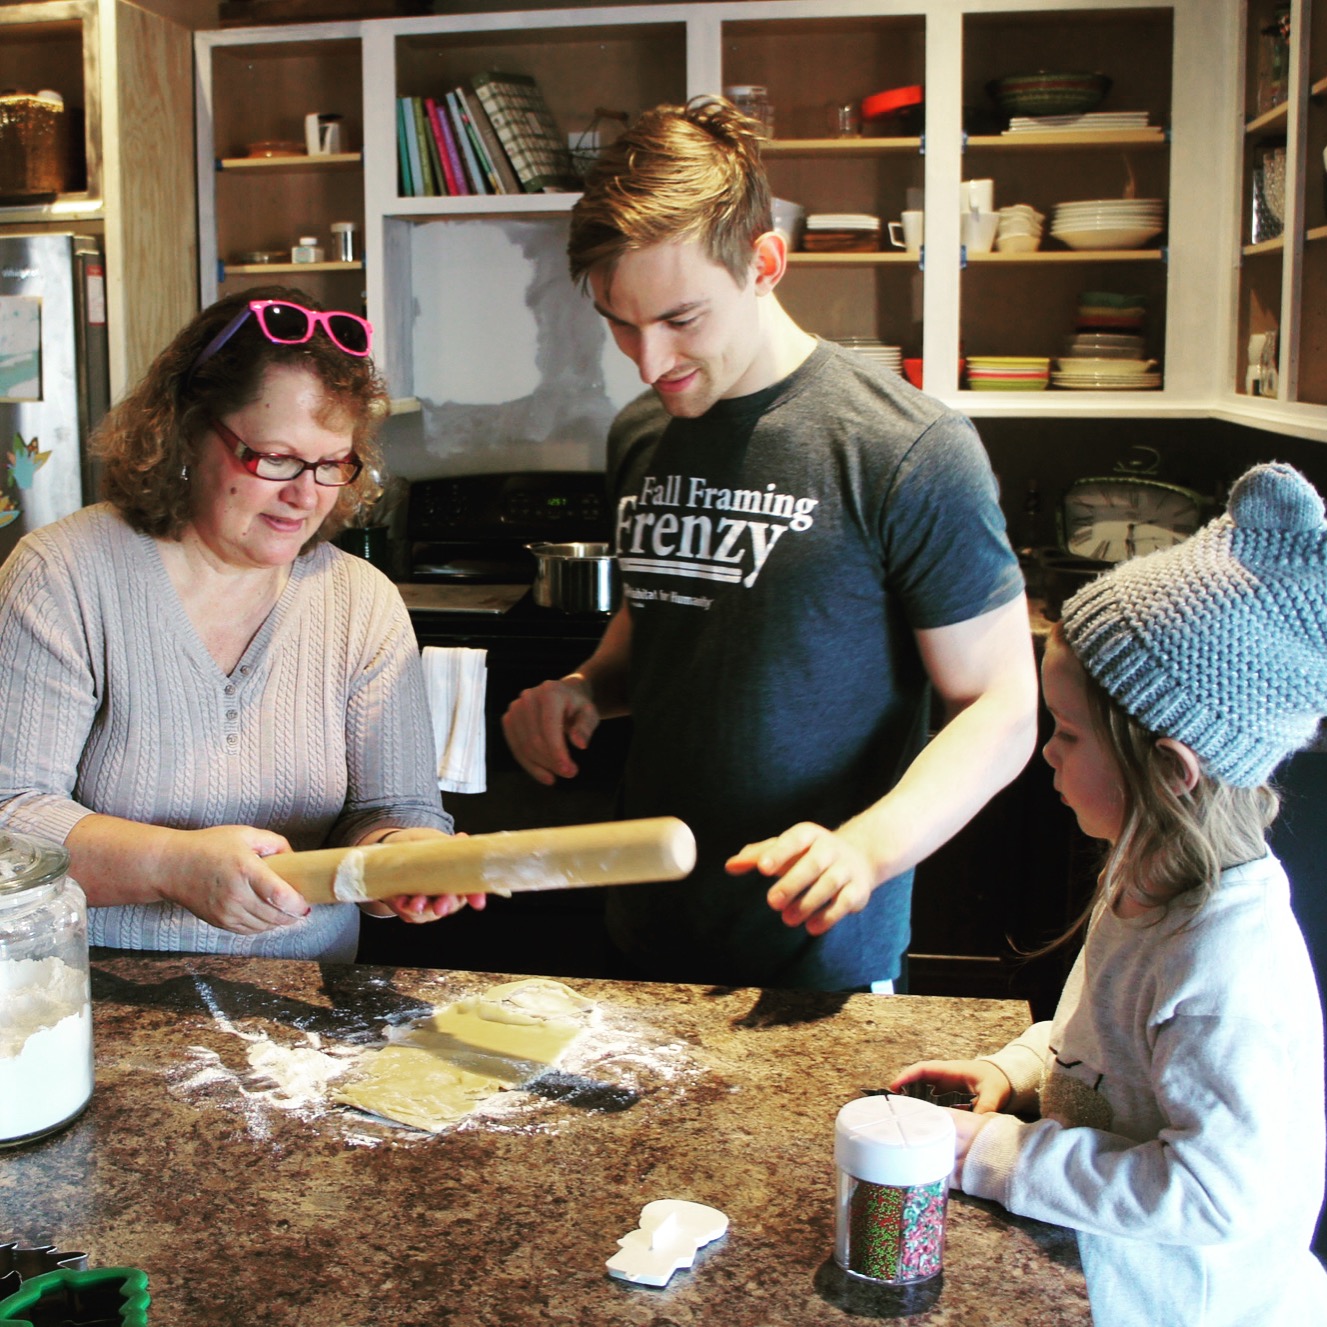
We hope all of you had a great Thanksgiving spent with family and friends. We were so excited to host our first Thanksgiving with family as Mike’s parents and brother came to visit. Kensi and Finn loved having time with them since we don’t get to see them often living so far away from each other. They especially loved playing with their Uncle Matt, whom we’re pretty sure was a little overwhelmed by all their energy. He was such a trooper though and spent lots of time playing with them outside and giving should-back rides throughout the house. I know they’re remember their special time with him.

Kensi was able to bake Great Grandma Trumm’s famous sugar cookies. She enjoys baking in general, but she loves when she can use sprinkles. Her little fingers were red and green by the time they were done and we all ate way too many cookies, but they were worth every bite.

Tuesday, November 29, 2016
leftover pumpkins

I officially have a pie pouch. After having Olivia and having to take things slow as I've been going to physical therapy for diastasis recti; I haven't gone back to excersing regularly as I had hope and this past week I ate way too much pie. It’s definitely showing, but I enjoyed every bite I ate. This is not the ideal time of year to kickstart an exercise routine especially when I’m baking in the kitchen, but I'm ready to jump back into my regular schedule. That is after I’m done making all these delicious ingredients for more pie.
Over the weekend we started decorating for Christmas and put away all our fall decor. This year I bought several pie pumpkins for the season and spent the last couple days roasting and making homemade pumpkin purée for all my baking needs in the upcoming year. No joke...I have over 25 bags of pumpkin each filled with 16oz. I have so much pumpkin I could seriously open a bakery with a speciality for pumpkin desserts. If you're reading this and you live near me and need or want pumpkin, please just ask. I'm happy to share!

Making pumpkin purée is simple and makes purchasing pumpkins for the fall season easier on the budget since they pull double duty. I roasted all our pie pumpkins, a cinderella pumpkin and a fairytale pumpkin so far. I still have two other pumpkins but I'm only opening them to clean, dry + freeze the seeds for planting next year.

I start by washing the skin of the pumpkin and slicing off the stem. Then, cut the pumpkin in half lengthwise and scoop out the seeds and discard them or set them aside to roast later. Drizzle the inside of each pumpkin half with oil and place face down on a rimmed baking sheet lined with parchment paper. Bake in a preheated 350 degrees F oven for 50 minutes. For the larger heirloom pumpkins the baking time needs to be adjusted to 60-70 minutes. Remove pumpkins and let cool. Once cooled peel away the skin and discard. Place roasted pumpkin in a blender or food processor and blend until smooth. Scoop 16 ounces of puréed pumpkin into labeled plastic zip bags and lay flat in the freezer.

Each pie pumpkin is nearly the equivalent to one can of store-bought puréed pumpkin. This is so simple and a great way to use every bit of the gorgeous pumpkin that brought so much warmth and joy during Halloween and thanksgiving!
Wednesday, November 23, 2016
thanksgiving prep + layered pumpkin butter dip

We've been prepping for Thanksgiving all week over here from making paper turkeys for the fridge to preparing all our ingredients for our favorite recipes. I love this sweet time of the year so much, and we feel so blessed to be able to share thanksgiving this year with my in-laws.
Kensi has been busy helping me make our grocery lists and even creating her very own. I just love watching her create and write each day! She loves pretending to be a mommy and often mimics different things I do, it’s so cute when she copy-cats my good qualities. This year I’m being brave and trying a new gratin recipe with brussels sprouts. I’m so hoping it turns out well since I'm finally over my phobia after getting so ill when I was pregnant with Kensi five years ago. Fingers crossed, wish me luck!


Growing up I always spent the morning of Thanksgiving watching the Macy’s Thanksgiving Parade, excited to see my favorite boy band perform (NSYNC girl here!), but we didn’t ever have a big breakfast because the day was focused on dinner which was eaten in the late afternoon to allow for grazing into the night. But today that’s just not the case. Since getting married seven years ago and hosting our own Thanksgivings or spending it with my sister and her family in California, there are certain traditions we’ve created together that we carry out for the holiday. One of them being breakfast.
Every year my brother in law Gunth makes eggs benedict and Mike makes his frittata. It’s become quite the tradition for us. However, this year we decided to add a crab cake to our eggs benedict because it’s just plain good and we needed to add a little bit of east coast greatness into the mix. Regardless of what we make for breakfast there is one item on the menu none of us can go without and that’s mimosas. They are a requirement for a festive holiday!
Along with a great breakfast I like to have something prepared for grazing purposes between meals. I’m making a pumpkin butter dip we first tasted at William Sonoma earlier this season. I know the kids will become hungry throughout the day and having a tasty + fun snack is a must. This dip works great for grazing or even an appetizer. If you decide to make it, I hope you enjoy it as much as we do!
Along with a great breakfast I like to have something prepared for grazing purposes between meals. I’m making a pumpkin butter dip we first tasted at William Sonoma earlier this season. I know the kids will become hungry throughout the day and having a tasty + fun snack is a must. This dip works great for grazing or even an appetizer. If you decide to make it, I hope you enjoy it as much as we do!
Layered Pumpkin Butter Dip
8 oz Cream Cheese [one brick], room temperature
1/2 jar Pumpkin Butter
1/2 cup Pecans, chopped + roasted
4 slices Bacon, crisp & crumbled
1 Green Onion, chopped
Spread cream cheese in small baking dish. Top with pumpkin butter, then bacon, pecans & green onion. Serve with crackers or celery sticks.
Wishing you a very blessed Thanksgiving.Monday, November 21, 2016
dull to rad bathroom makeover

Before we begin our overhaul on painting the kitchen cabinets, we decided to work on a much smaller space, the kids’ shared bathroom. This gave us the perfect opportunity to try our hands at painting the small single bathroom vanity cabinet before the kitchen cabinets. It was pretty much our guinea pig; and the results were fantastic!
Mike and I originally had plans to keep this bathroom neutral, but we needed color and since this is the kids’ bathroom, we couldn’t keep it boring. I’ve been pinning bathroom design ideas for years and decided it was time to create a bathroom we all could love. One of my favorite bathroom pins is this one. I love the color combination and knew I had to incorporate this beautiful design somewhere, somehow in our home and it just so happens this bathroom has quite a bit of light and needed some life breathed into it. After trying a couple different paint samples we decided to go with black, white and teal.


The Process


I always love seeing before, during and after photos of a space. The transformations can be astonishing. I snapped these ‘before’ photos just after we had taken down the towel bars and we were getting ready to remove the cabinet doors for sanding. Our cabinets are basic cabinets we chose when building. They’re not our style, but they fit into our budget at the time and they function well so there was no point in ripping everything out.
Mike and I decided to put some sweat into this mini renovation and painted the cabinets the good ol’ fashion way by cleaning, sanding, cleaning, priming, sanding, cleaning, painting, sanding, cleaning and finally painting a final coat. It sounds much worse than it actually was. Yes it is a process, and yes after each coat of paint we let everything sit for an entire day, but it works very well.


I love the bold style this bathroom now has. It was a little risky to paint the walls black and the vanity a pop of color, but we love it. This was a great space to add color and hopefully soon some pattern. I love the colored vanity so much because it’s versatile, gender neutral and modern + classy all at the same time. Aside from painting, we swapped out the chrome faucet for oil rubbed bronze. We also took down the boring rectangular mirror for a brass round one. We removed the single towel rack which wasn’t functional for this bathroom and put up individual monogrammed hooks for each of the babes. It works great because now everything is at their level.
As for most of the decor pieces, we repurposed things we had on hand. Shopping around the house is a simple way to reinvent decor we already own. It keeps us on budget and makes the pieces that seem tired, new again. However, I am on the search for new towels and a few fun accessories to finish off the space.

This was a simple update to a dull bathroom and to make it even better we really want to rip out the flooring and replace it with tile, but it’s just not in the budget right now. Hopefully, we can do it in the coming months! All these pieces and small changes carry a big punch and now give this bathroom so much more character. It goes to show we don’t have to completely gut a bathroom to give it style and flare. The kids love this space and it’s a place all their own.
\\Source List\\
Wall Paint Color - Benjamin Moore Black Jack
Vanity Paint Color - Benjamin Moore Pacific Rim
Mirror - Target
Boat - Oil & Carol
Wall Shelf (old, but similar here)
Bath & Shower Curtain - Target
Monogrammed Hooks - Anthropology
Thursday, November 17, 2016
kitchen cabinets: phase one

We've been dying to redo our kitchen since day one of our house. We've always loved white cabinets and really wanted to install them when we chose everything at the design studio, but the ones we loved were not in our budget. We would have had to give up several other upgrades in place of them. Knowing we could either replace or paint them down the road we went with the dark espresso and also skipped the hardware.

Now, just shy of three years since moving in, we are finally painting them! My original goal was to have them done by Halloween, but life happened. My next goal is Thanksgiving, which is next week and my in-laws are coming to visit this weekend. Crazy? Of course, but that's just how we roll!

Our overall vision is to paint all the cabinets while adding character detail, add open shelves on our huge blank wall, replace the stove top/oven combo and install new countertops + backsplash. To make things a little bit easier, Mike and I have decided to do this this kitchen renovation in phases. How many phases??? We're not exactly sure yet, but at least three as it will depend how we decide to budget each phase and how quickly we want to move through it.
We're starting by just focusing on the upper cabinets. We know for sure we want those to be white, and we think we've settled on painting the lowers a dark gray, but we won't fully commit to that until the uppers are done and we can see how much more light they bring into the space. If we need even more light, then we'll paint the lowers white as well. I know that's a mouthful and you're probably thinking I'm such a scatter brain for not deciding, but I'm a girl and I tend to change my mind. A lot. I'd much rather go in phases and get a feel as we move through this process instead of rushing and not loving the final product.


Happy Friday Eve
xo
Monday, November 14, 2016
chocolate orange cookies

We’ve spent the last two weeks enjoying being by ourselves. After the chaos of the election we had to step away from most social media pages and just pray. It was heartbreaking to see so many hateful words being displayed by our friends. We knew we could fire back with similar hurtful words, but instead we decided to use our words and actions to what we believe is the best use...prayer. We have been praying for our community, our neighbors, our friends and family, and most importantly our new President-elect because we know who our true King is and only He can guide us. We want our new President to succeed. We need him to succeed.
To distract us from all the crazy we turned to Christmas music and baking. I shared in our fall favorites post this recipe for pumpkin spice donuts. The kids love these little dough balls. We whipped some up last week and split the batch into two; one dusted with powdered sugar and the other with cinnamon-sugar. The family voted and the results were unanimous...powdered sugar was the winner!
On Wednesday, I put together a meal for a our friends who just became a new parents. With their meal Kensi and I made chocolate orange cookies. Ever since we had the one in Asheville from Well-Bred Bakery we were dying to try and make them ourselves. I absolutely love the combination of chocolate and orange! I looked at a few different recipes and came up with my own. Instead of using orange extract, we used our orange essential oil. (insert high five emoji here). I was thrilled with the results and Kensi has now requested to make these for Santa this year. I’m pretty sure he’ll enjoy them!


Double Chocolate Orange Cookies
\\Ingredients\\
1/2 cup Unsalted Butter, softened at room temperature
1/2 cup Brown Sugar
1/2 cup White Sugar
1 Large Egg, room temperature
1-1/2 teaspoons Pure Vanilla Extract
Zest of 1/2 an Orange
2 to 3 drops Young Living Orange Essential Oil or 1/4 teaspoon Pure Orange Extract
1 cup + 2 tablespoons Flour
1/4 teaspoon Kosher Salt
1/2 teaspoon Baking Powder
1/2 teaspoon Baking Soda
2 tablespoons Dutch Cocoa Powder
2/3 cup Semi-Sweet Chocolate Chips
\\Directions\\
Preheat oven to 375 degrees F. Prepare baking sheet lined with parchment paper.
In a bowl, cream butter, sugar and vanilla together until light and fluffy. Add orange zest and orange essential oil. Add the egg and beat until mixed in.
In a separate bowl, sift together flour, baking powder, baking soda, salt and cocoa powder. Gradually add flour mixture into the butter and sugar mixture. Once combined, fold in chocolate chips.
Scoop cookie dough into balls and place on lined baking sheet. Bake 8 to 10 minutes and allow to cool before serving.


Wednesday, November 2, 2016
first + second month favorites

Wow, this post is officially overdue and I almost thought it would simply get thrown out. Trying to raise three awesome babes, own housework and rock this wife thing is crazy hard work! I’m barely surviving most days and can’t wait to lay in my comfy bed at night that’s now always surrounded by every single piece of clean laundry. However, aside from my duties of mom and wife, I also feel I have a duty to share items and products that have helped me and Mike get through each day with fellow parents. I’ve seen other bloggers do these same posts and I’ve always found them helpful, but each year products change and new ones are introduced. Even for us, some of the products we found ourselves using with Kensi are different today with Olivia. So here are our first and second month favorites. We hope they can help you along this incredible journey of parenthood and make the daily tasks a little easier.

| Bralettes | I love wearing barlettes instead of nursing bras these days. They’re super comfy, stretchy, pretty and easy on the budget. I also love the huge variety carried by several different stores with various straps that make it easy to wear under almost anything.
| Knotted Sleep Sacks | We love sleep sacks for our baby. They keep those little legs and toes tucked inside for warmth and they’re fairly easy to put on as they go from the bottom up.
| Bamboobies Washable Nursing Pads | I wish I had these with Kensi and Finn. I’ve always used the disposable nursing pads and hated them because they often made noise in my shirt and weren’t soft against my skin. The owner of the boutique where I bought mine said these nursing pads are cashmere for nipples, she’s totally right! These washable nursing pads are so soft and easy to keep track of based on the bright colors (but don’t show through). Also, washing these are much easier than I ever anticipated.
| Natursutton Pacifier + Wubbanub Pacifier | Not all babies take pacifiers, but Olivia loves hers. We keep a few on hand including the Natursutton which has a larger nipple and it’s easy for her to keep in her mouth. We also like the WubbaNub especially at night because it’s easy to find and she can snuggle it.
| Little Unicorn Muslin Quilt | I’ve always wanted muslin quilts for our babies and finally broke down and bought one. Yes, they can seem a little pricey, but they’re SO COZY! They’re perfect for tummy time and our evening walks when it’s cool. Now if I could just find one large enough for myself, I’d be all set.
| Young Living Essential Oil Gentle Baby | I love this oil for massaging our babes. It can be used during pregnancy and also during delivery. It’s relaxing and promotes bonding. It also helps the appearance and prevention of stretch marks.
One of our most valued and essential item is a big sister. Kensi is seriously the biggest helper of all time and we really don’t know what we would do without her. Her desire of serving and love of babies is not only beautiful, it’s life saving. Whenever Olivia begins to cry Kensi comes rushing from whichever corner of the house and at the stop of her lungs shouting “BINKY, BINKY, BINKY!!!! I’M COMING BABY GIRLLLLLLL!” She is the sweetest big sister we could have hoped for!
Tuesday, November 1, 2016
happy halloween


We hosted a costume party over the weekend and had too much fun. We set up fun for the kids including a pumpkin decorating table, a friendly ghost piñata and movies in the backyard using a projector. The kids had a blast, especially watching their favorite Halloween flicks on the back of the house with individual bags of popcorn and caramel apples! I did a terrible job getting photos of everything, including the setup and due to our lack of lighting in the backyard [which Mike and I both vow to install this new year] Once the party started the sun was nearly down and took away any hope of light.


Princess
This dress is actually pretty special because Kensi helped design it. We did use a pattern, but with a little help of color guiding she picked out her fabric and I put it together. It’s a little rough and we made a few alterations along the way, but she adores it and that’s all that matters.

Dragon
Finn's costume was easy to create since everything was its own separate piece, which allowed him to wear what he wanted or didn’t want throughout the night without being too hot.

Knight
Mike does a great job of going with whatever crazy plan I come up with and I always try to keep his costume ridiculously simple. He wore a basic gray long sleeve shirt and pants. I made his armor from two cardboard t-shirt boards found in the craft department. I used spray paint and a permanent marker to create the armor details and attached them with straps over the shoulder. We both dropped the ball on making a helmet which would have really helped his costume, but oh well.
// armor - handmade // sword + shield //
Queen
To make my queen costume, I started with a black skirt and t-shirt. This allowed me to be comfortable and protected me from the itchy tulle. The main piece of my costume is a 15 layered cape-like dress that tied around the neck and secured with a ribbon at the waist. It was so dramatic and flowy!
// black skirt // tulle dress tutorial //
Unicorn
Lastly, we have Olivia who was our little unicorn. Since she is so little her costume pretty much consisted of this amazing + crazy adorable unicorn crown. I'm a maker, but I'm in awe of the details Elliot Everlasting put into this piece. It is definitely something I will treasure for our sweet girl.

Well, there you have it! This year's Halloween has officially come and gone and we had a blast celebrating all month long. It’s pretty great being able to make such special memories with our babes as these years go by all too quick and this season of life will be over sooner than we would like.
Our costumes will now make their way to our dress up bin for the kids to play in for hours! We crammed a lot of activities in the past week and as much fun as it was I’m excited to enjoy this week of peace and calm....that is until next next week when I begin planning Thanksgiving! It’s really never ending.
Our costumes will now make their way to our dress up bin for the kids to play in for hours! We crammed a lot of activities in the past week and as much fun as it was I’m excited to enjoy this week of peace and calm....that is until next next week when I begin planning Thanksgiving! It’s really never ending.

Subscribe to:
Posts (Atom)
