
Over the last few years we’ve debated what we should do with the empty wall space above our peninsula. We always feel there is a lack of storage in our house and although it's a good space for our chalkboard, we continued to go back to the idea of adding open shelves. We really don’t know why we didn’t do this project sooner because not only did we gain extra storage, but the project itself was inexpensive and easy once we figured out a few small hiccups.

We originally began looking at brackets on Etsy with a budget of $200 for the entire project. We wanted the brackets to be hidden and we didn’t want to build the shelves from scratch by creating a box and sliding it onto 1X1 boards. The initial brackets we found were very pricey at $80 a piece and we knew we would only be able to afford to do two shelves. Nearly ready to dive into this big purchase we decided I would dig a little bit deeper and try to find other brackets that may work. My digging paid off and I found Dolle STRONGFIX Floating Shelf Brackets from Blue Stone Shelves. These brackets are sold in pairs and together can hold 88lbs. The best part is a set of the brackets cost a whopping $6.99. At this price point we were able to put in three shelves and ordered two sets of brackets per shelf.
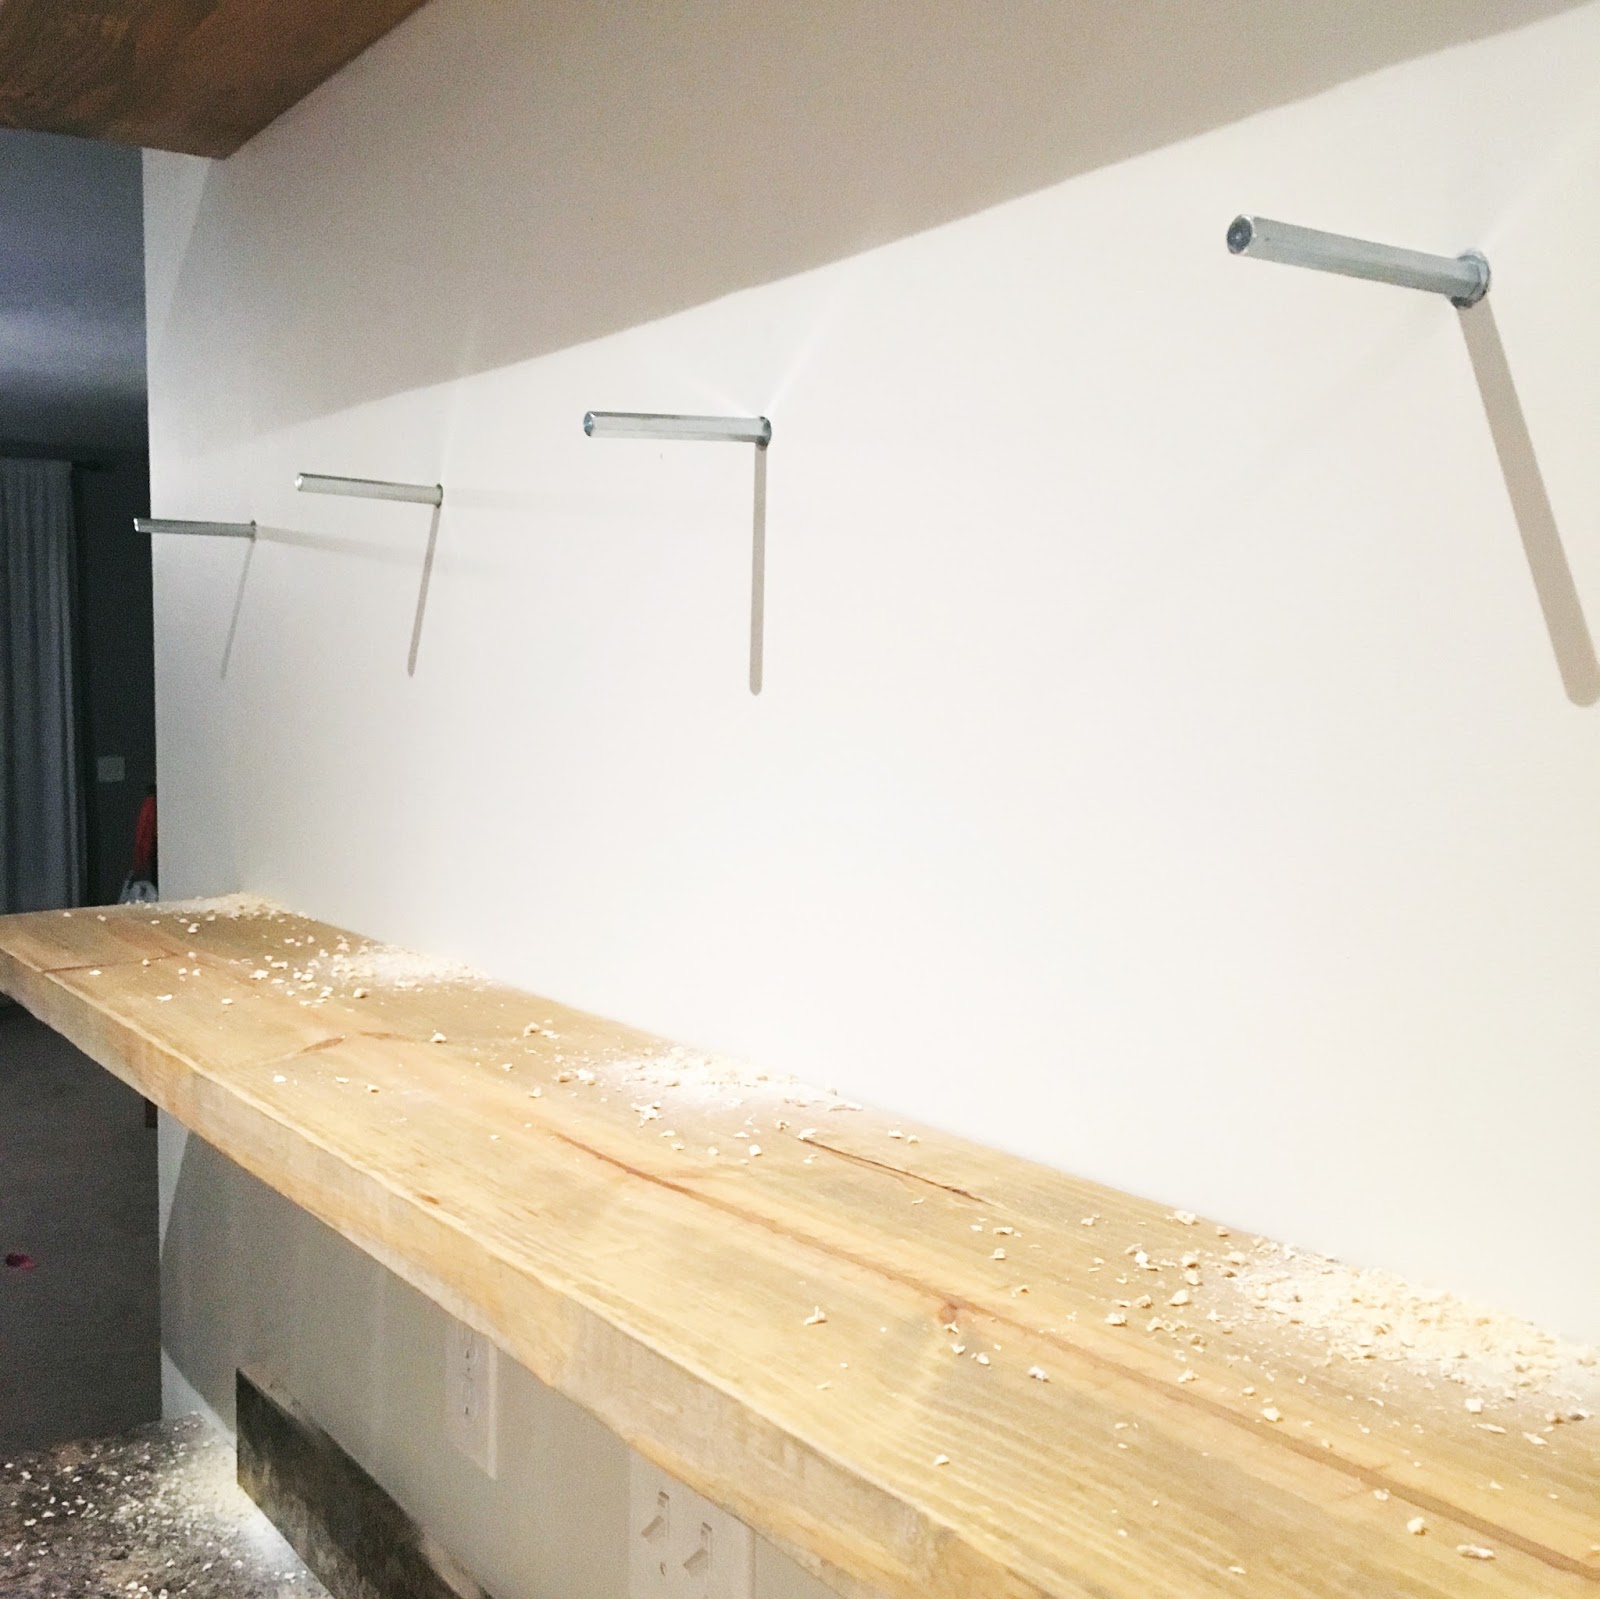


Once the brackets were ordered, we purchased three 2X10 pine boards, cut them to length (we now have scraps for shorter shelves in another space for later!), sanded and stained them. I mixed Minwax Weathered Oak with a small amount of Minwax Jacobean and applied one layer of stain. Mike anchored each bracket into the studs on the wall making sure they were all in line using a laser level. Then, using a drill press, he made each hole into the 2X10 board for each bracket. Lastly, Mike slid each board onto the anchored brackets and used a rubber mallet to pound everything into place.
 We are so excited to finally be able to display our favorite glassware and kitchen accessories on the open shelves. It’s created more space and it’s opened up more space in our cabinets. We absolutely love the added shelves and it’s one more detail that has helped transform our kitchen space! On top of it all the cost of the project was awesome....
2x10 Pine Boards..........$24
Dolle Shelf Brackets.........$42
Minwax Stain.....$8
Project Total: $74
The whole project cost less than one set of the original brackets we were planning to purchase. Now, this is when waiting and digging does a project and diy-ers well!
Questions & Tips About the Project
What size bit did you use?
Instead of using the recommended 12mm (approx. 1/2 inch) bit stated in the instructions for the Dolle STRONGFIX Floating Shelf Brackets , we used a 15/32 inch bit. The 1/2 inch was too large.
How far did you space the shelves?
We spaced our shelves approximately by one foot. Measuring the top of one shelf to the top of the next shelf is 13.5 inches which also means when we anchored the brackets into the studs of the wall, the brackets were 13.5 inches apart, shelf to shelf.
Where did we purchase our boards?
We bought the boards from Lowes Home Improvement. They can also be purchased at Home Depot.
How did you choose your boards?
We chose 2x10 inch boards because of the items we wanted to fit on the shelf. The brackets used for this project are suggested for 2x8 inch and 2x10inch boards. When selecting the boards, be sure they are not bowed. To check this, look at the board from end to end in both directions. If the board looks like it bends, put it back and choose a different board.

I was just getting ready to buy those expensive shelve brackets, I am so glad you posted this!!! I did have one question, were you able to get the wood at Home Depot or Lowes?
ReplyDeleteHi Caitlin! We shop are both stores, but we purchased these boards from Lowes because they had a better selection of boards that weren’t as bowed at the time. I hope that helps with your project!
DeleteThank you so much for your response! One more question...do you know how many inches there are between your shelves? It looks like the perfect amount. Thank goodness you posted this today. You saved me hundreds of dollars as I am about to put 5 floating shelves in my kitchen and was going to purchase those expensive brackets this morning!
DeleteIt sounds like you have a fun project ahead of you, I’m so glad this post could help! I edited the post and added answered questions at the bottom. When we put the brackets into the studs, we placed them 13.5 inches apart, shelf to shelf.
DeleteWonderful post! We are linking to this particularly
ReplyDeletegreat content on our site. Keep up the good
writing.